
Features
This page covers the core features inside MonstarX. If you haven't built your first app yet, start with Getting Started.
The Workbench
After your app is built, the Workbench opens automatically. It's your project workspace, and it has three tabs:
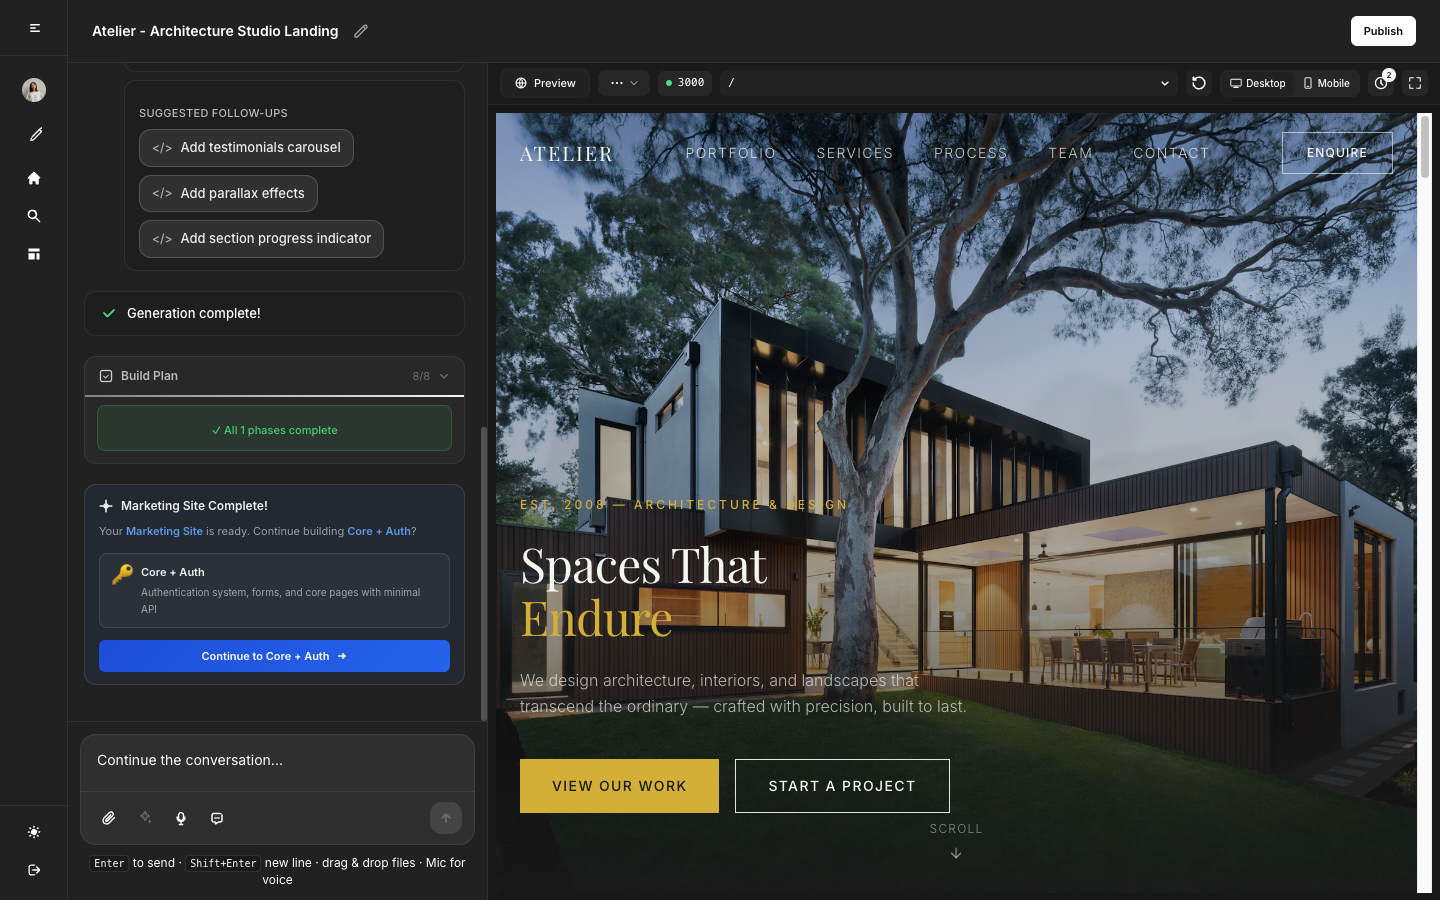
Preview Tab
The Preview tab shows a live, interactive version of your app. You can click buttons, fill in forms, and navigate between pages, exactly as a real user would.
Use Preview to:
- Verify the app matches your intent right after the initial build
- Confirm a change worked after sending a follow-up message
- Do a final check before publishing
Keep in mind: if a required service isn't connected, some actions (like saving data or logging in) will fail in Preview even if the page loads. Head to the Connectors tab to fix this.
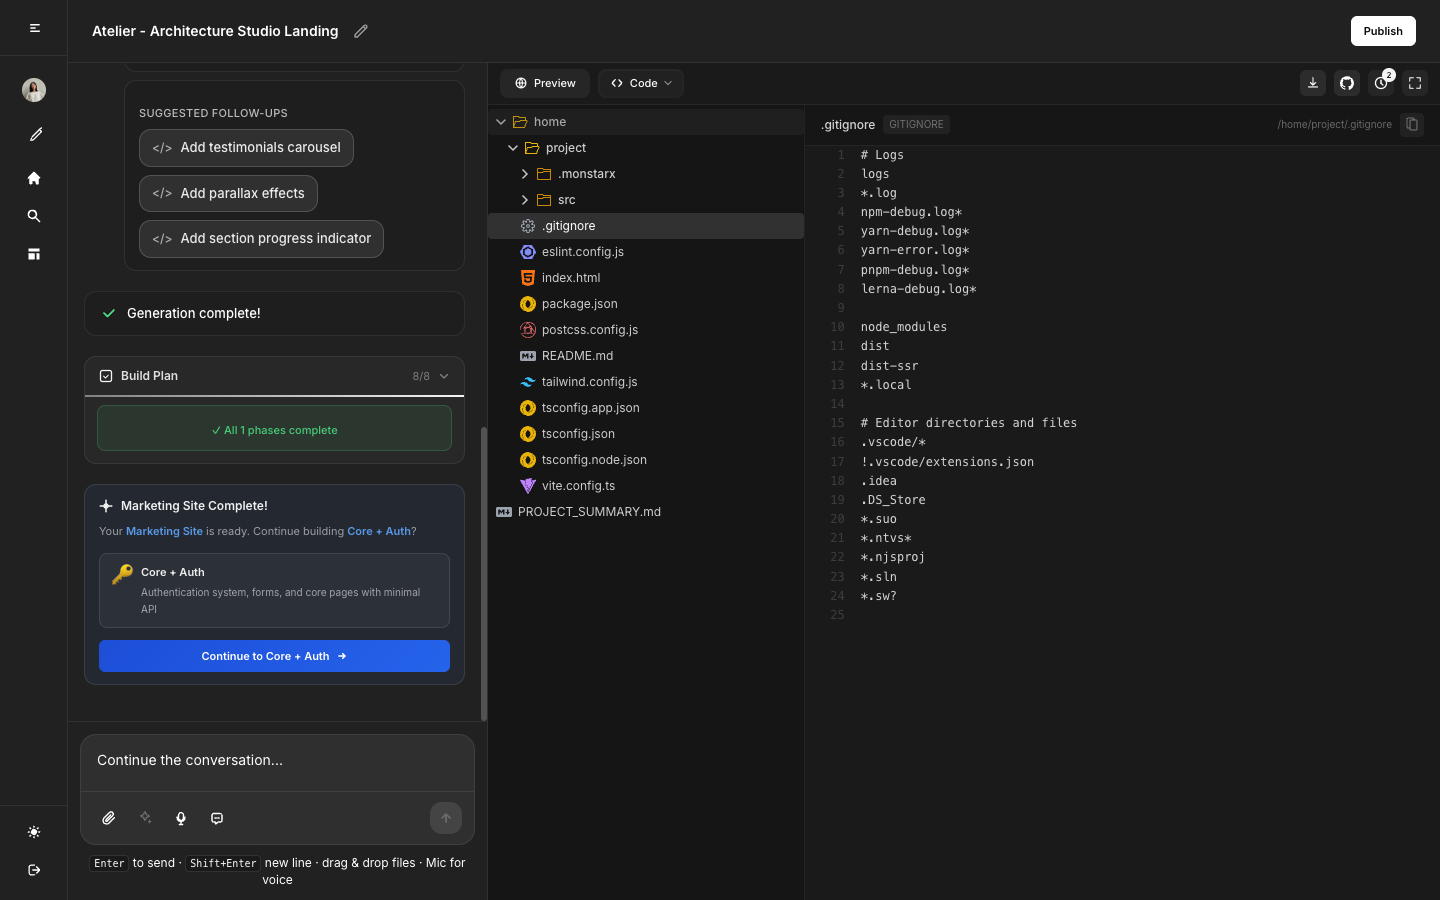
Code Tab
The Code tab gives you a browsable view of your app's source files.
Use it to:
- Verify what MonstarX built
- Copy a specific piece of logic into another project
- Understand the structure before requesting a change
Note: Direct editing from within the Code tab is not available. To make manual edits, push your code to GitHub first and edit it there.
Connectors Tab
The Connectors tab lists all external services available for your project, along with their current status.
- Connected — Active and working
- Required — Must be connected, your app won't work without it
- Optional — Not required, your app works without it
- Not connected — Available but not yet set up
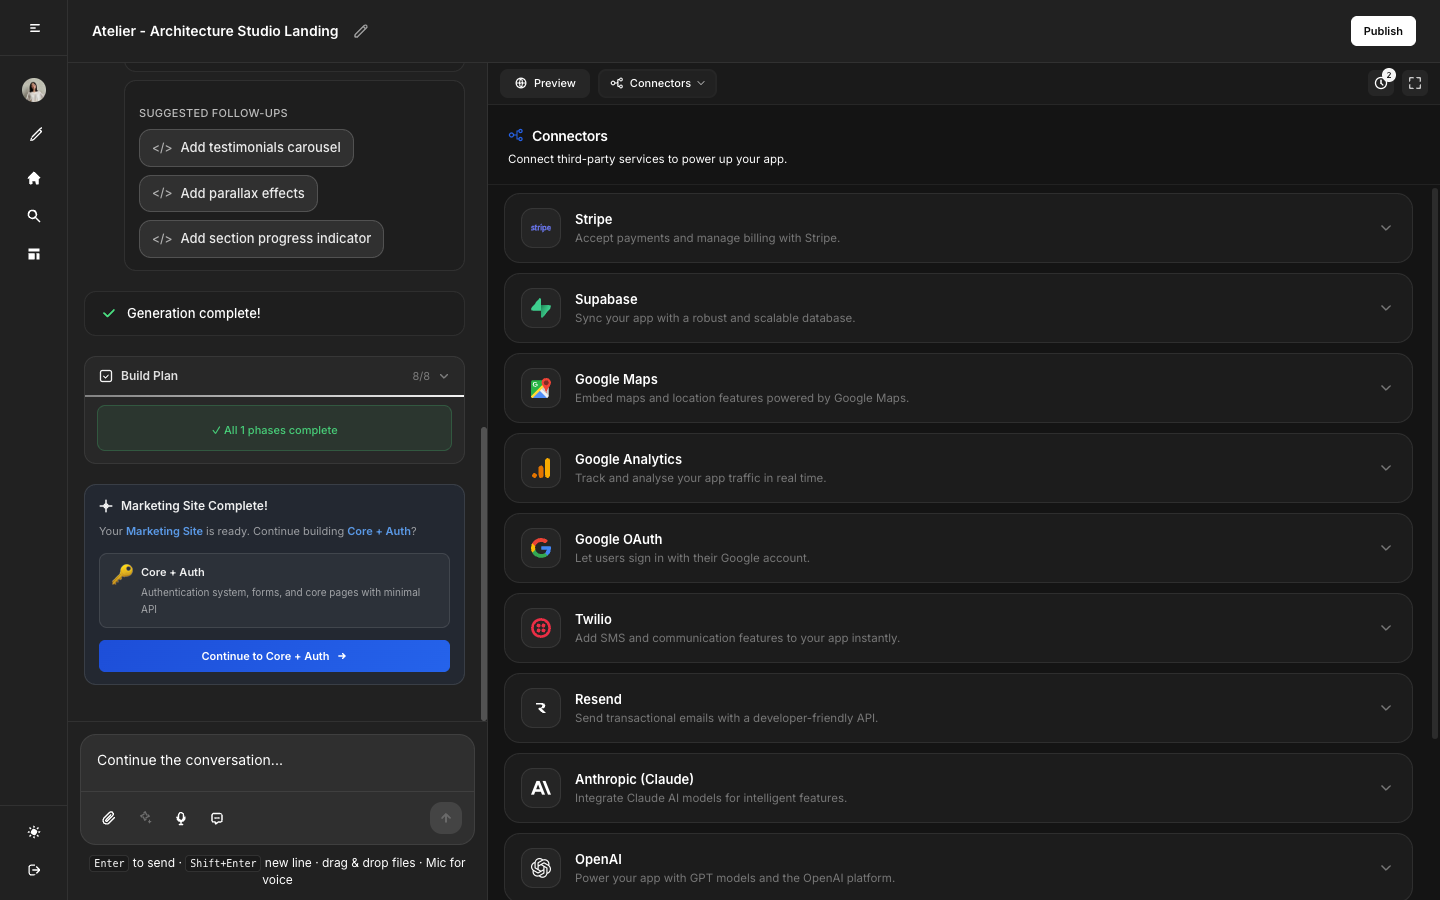
For step-by-step setup instructions for each service, see Integrations.
Discuss Mode
Discuss mode lets you have a conversation with MonstarX without triggering a rebuild of your app.
Use it to:
- Ask questions before making a change
- Check whether a planned change is small or large
- Understand why something was built a certain way
- Think through an approach before committing to it
How to activate:
- Find the Discuss toggle near the message input. The tooltip reads: "Ask questions without building or redeploying preview."
- Click to enable it, the active state shows "Discuss mode on."
- Type your question and send it.
- MonstarX responds without touching your app.
- When you're ready to make the actual change, turn the toggle off and send your prompt normally.
Sending a regular message can trigger a full rebuild. Discuss mode lets you confirm the approach first, saving time and credits.
The Plan-First Flow
Every project in MonstarX follows this sequence, and no step can be skipped:
The plan is your only checkpoint before building begins. If something's off, correct it before approving, it's much faster than fixing a built app.
Project Scope Tiers
When you start a new project, you'll choose one of four scopes:
- Marketing site — Static pages, no user accounts or database
- Core + Auth — Forms, light backend, and login
- Full Application — User accounts, database, and service connections
- Full + Admin — Full Application plus an admin panel
Choose Marketing site for content-only pages. Choose Full Application if your idea involves storing data, handling payments, or connecting services. Choose Full + Admin if you need to manage users or content after launch.
Changing scope mid-project requires starting a new plan.
File Attachments
You can attach files to your initial message to give MonstarX more context before it writes the plan.
Supported formats: PDF, Word (.docx), plain text, Markdown, and images (PNG, JPG)
Great for:
- A product brief or spec to reduce back-and-forth questions
- A wireframe or screenshot to communicate visual intent
- An existing data structure you want MonstarX to work with
How to attach:
- Click the attachment icon in the message input.
- Select your file.
- Add your message and press Send.
Visual Edit
Visual Edit lets you click any element in the Preview and adjust it directly — without writing a prompt.
What you can do:
- Change text content by clicking it and typing
- Swap images by clicking and selecting a replacement
- Adjust spacing, colors, and typography using the style panel
Visual Edit is non-destructive: changes are reflected back to the codebase through MonstarX, so your app and source files stay in sync.
When to use it:
- Fine-tuning copy or layout after a build
- Making quick cosmetic changes without a full rebuild
- Checking exactly which element maps to which source element
Publish and Unpublish
To publish: Click Publish — this creates a live, public URL for your app that's ready to share immediately.
To unpublish: Click Unpublish — your app goes offline and the URL stops working. You can republish at any time.
Custom Domain
You can connect your app to a domain you own, or buy a new domain directly from MonstarX.
Option A — Buy a domain through MonstarX
- Open Project Settings → Domain.
- Search for an available domain name.
- Purchase and confirm — MonstarX handles DNS setup automatically.
Option B — Connect a domain you already own (BYOD)
- Open Project Settings → Domain → Connect domain.
- Enter your domain name.
- Copy the DNS records shown and add them in your domain registrar (e.g. Porkbun, Namecheap, GoDaddy).
- Click Verify — propagation can take a few minutes to a few hours.
Once connected, your published app is available at your custom domain with HTTPS automatically.
SEO Settings
Each published project has an SEO panel to control how it appears in search engines and link previews.
What you can set:
- Page title and meta description
- Open Graph image (shown in social media link previews)
- Robots/indexing preferences per page
To access: open Project Settings → SEO after building your app.
Optimize SEO — MonstarX can also analyze your published app and suggest improvements to your content structure, headings, and metadata. Tap Optimize SEO inside the SEO panel to run a check.
GitHub Export
GitHub export sends a copy of your app's code to a repository of your choice.
Steps:
- Open the Connectors tab and connect your GitHub account.
- Click the GitHub push option.
- Give the repository a name and confirm.
Use this when you want to continue development outside MonstarX, deploy to your own server, or keep a permanent backup of your code.
MXCloud (Platform Backend)
MXCloud is MonstarX's built-in backend for generated apps. Instead of connecting a third-party database or auth service, your app can use MXCloud services directly — no external account needed.
Available MXCloud services:
- Database — PostgreSQL-backed tables with row-level access rules
- Auth — User sign-up, sign-in, and session management
- Storage — File and image hosting for your app
- AI — Call AI models from inside your app (billed through your credits)
- Email — Transactional emails without a Resend account
- Maps — Address geocoding and map rendering
MXCloud is the default backend option when your app needs data or auth. You can still connect Supabase or other services if you prefer.
For more details, see MXCloud → or go directly to mxcloud.monstarx.com.
Country MCP
Country MCP provides live, structured data for specific countries — accessible to your app at build time and at runtime.
What it covers: public datasets (weather, transport, business registry, property prices, and more) for supported countries.
Live countries: Singapore, Japan, Malaysia, India, Indonesia, Philippines, UAE, and more being added.
MonstarX connects to the relevant Country MCP server automatically when your app requests country data. You can also explore endpoints directly from the MCP tab in your Workbench.
For more details, see Country MCP →.
Language Options
The MonstarX interface is available in 17 languages including English, Japanese, Arabic, and more. Switch languages from the settings panel in your account.
Feature Availability by Scope
| Feature | Marketing Site | Core + Auth | Full Application | Full + Admin |
|---|---|---|---|---|
| Preview | ✓ | ✓ | ✓ | ✓ |
| Visual Edit | ✓ | ✓ | ✓ | ✓ |
| Code tab | ✓ | ✓ | ✓ | ✓ |
| Connectors | Limited | Partial | Full | Full |
| MXCloud Database | No | Partial | ✓ | ✓ |
| MXCloud Auth | No | ✓ | ✓ | ✓ |
| Login / Auth | No | ✓ | ✓ | ✓ |
| Payments (Stripe) | No | No | ✓ | ✓ |
| Admin panel | No | No | No | ✓ |
| Publish / Unpublish | ✓ | ✓ | ✓ | ✓ |
| Custom Domain | ✓ | ✓ | ✓ | ✓ |
| SEO settings | ✓ | ✓ | ✓ | ✓ |
| Country MCP | ✓ | ✓ | ✓ | ✓ |
| GitHub export | ✓ | ✓ | ✓ | ✓ |